Getting Started
Our goal is to extract structured data from over 9 million pieces of weather observations captured at McGill's observatory since 1863. We need your help to transcribe all that information!
Take a moment to review the steps of the transcription below process before getting started.
When you are ready, sign in and click on Transcribe to begin transcribing a page!
If you run into any problems check out our FAQ's or Report a Problem
Step 1: Set Up Your Transcription Environment
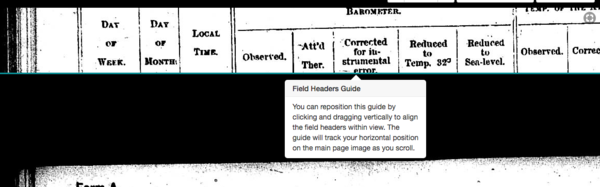
The transcription environment has a top header and a left-side header which can be repositioned so that the text is clear.


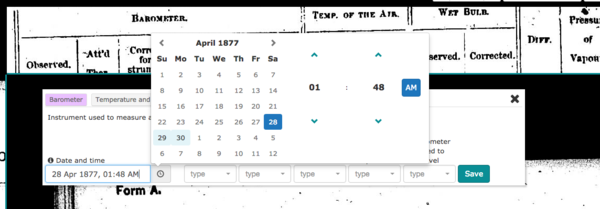
Step 2: Changing the Date
Click on the first tab (ex. Barometer).

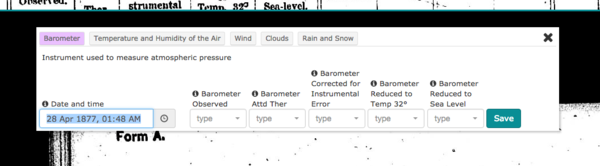
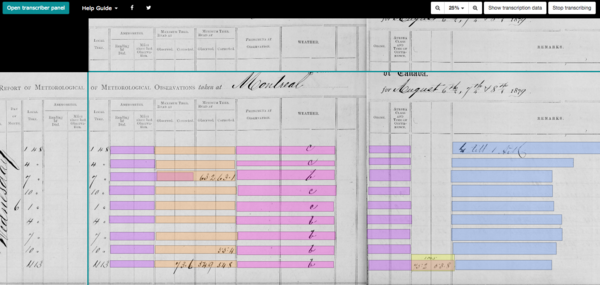
Step 3: Start Transcribing
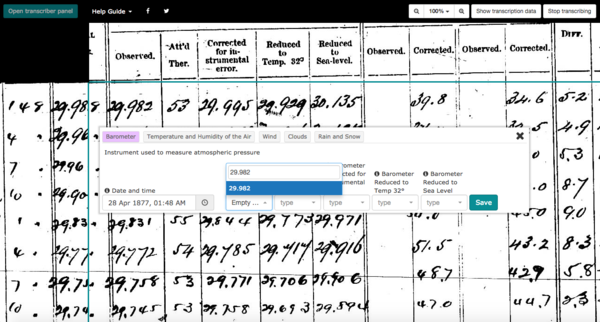
You are ready to start entering data!
We recommend you enter the data one row at a time, working through the tabs for each row from left to right - working from Barometer to Rain and Snow, for example.
Press "Save" after entering the data in each tab before going on to the next tab. You can enter all the data from one column at a time, such as "Barometer", but you need to remember to change the time for each new row.
After you've finished entering data into one of the tabs, you will be prompted to draw a highlight box around the observations you have just transcribed. Make sure not to include the date into this highlighted box, just the data you entered.
If you have accidentally included the date or time in this box, don't fret!
The box can be edited by hovering your mouse over the highlighted box. On the left you will see three symbols - Edit the Annotation, Resize the Annotation, and Reposition the Annotation - and on the right you will see a red symbol Delete Annotation.
![]()
Edit the Annotation: will allow you to edit the data you inputed into this tab
Resize the Annotation: will allow you to resize the current highlight box by clicking and dragging the bottom right corner.
Reposition the Annotation: will allow you to move the current highlight box around by dragging it into position.
Delete the Annotation: will allow you to fully delete the highlight box and the data and begin once again on this transcription tab.
Once a tab has been complete and a highlight box has been drawn, you can move on to the next tab until the entire row is finished.

Repeat this until the observations from every row have been entered!
Note: If you have accidentally clicked out of the transcriber panel, don't worry! Simply go back to the "Open transcriber panel" button in the top left corner and navigate back to the tab you were currently on, checking to ensure that the date and time are correct.
Step 4: Final Touches
You can take a break whenever you want by clicking "Stop Transcribing" in the top right corner.

A pop-up will appear with two choices:
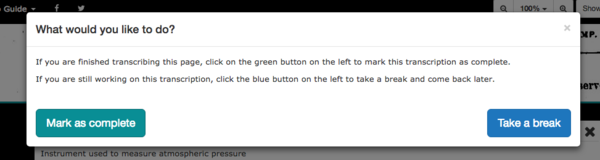
Take a break: will allow you to pause your transcription and come back to it later
Mark as complete: will tell us that you are finished transcribing the entire page and are ready to move on to your next page
Clicking "Take a break" will bring you to a summary of what you have completed so far on this specific transcription while "Mark as complete" will bring you to the "My Transcriptions" page, where you can view or continue any of your previous transcriptions.
Getting Help
Don't hesitate to contact us if you have any issues with the transcription process!